Technology

How To Seal A Bathroom Sink Drain

How To Seal A Bathroom Sink Drain

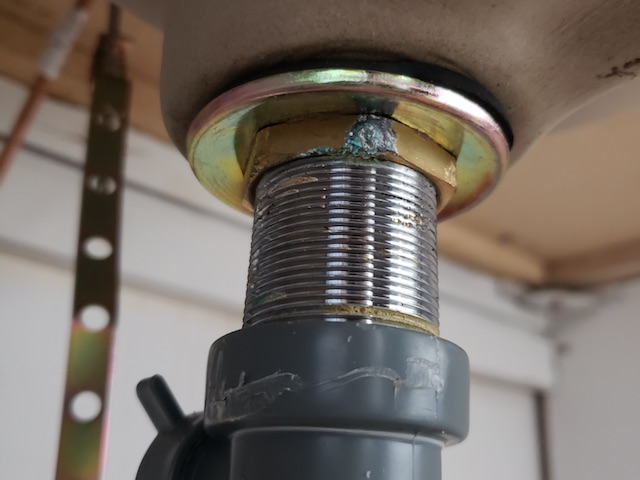
Imagine running late to work and having to hurry to brush your teeth (we've all been there). Grab the toothbrush, squeeze out some toothpaste, and turn on the water to wet the brush but now you hear the splash of water coming from under the sink. The bathroom sink drain is leaking around the threads and everything is soaked.

Why is the sink leaking, and better yet, how do I fix it? In this tutorial, we will use a process of elimination to help you answer both questions.
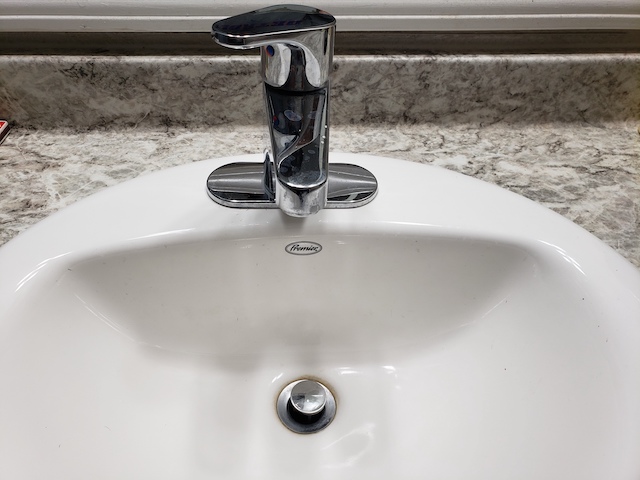
Bathroom sink looking down

Step 1 – Check the Nut

First thing you should do when your sink drain is leaking is to grab an adjustable wrench and take a look at the nut underneath the sink. Also known as a "Slip Nut" or a "Drain Nut," this piece of hardware secures the sink to the drain.

Use your wrench to test the how tight the seal is. If the nut moves when you put the wrench then it needs to be tightened. Conversely, if the nut really won't budge it's possible the rubber gasket has been compromised and will need to be replaced.

Gradually tighten or release the pressure on the nut accordingly, run the water, and see if the problem persists. If this quick fix doesn't work then it's time to take apart the drain and look closer at the working parts.

PRO TIP: Turn off the hot and cold water supply and grab a bucket while you're at it just in case.

Step 2 – Inspect Drain Components for Cracks, Warps & Malformations

Use the wrench to loosen the drain nut and begin taking everything apart. Once you have the drain fully disassembled lay out all the individual components in the order they came apart, from left to right. Also, if you don't have great lighting in your bathroom you should grab a flashlight or use the light on your phone to help illuminate and inspect each part.

What you are looking for damage to the individual parts. Warped? Cracked? Twisted? If the answer to any of these questions is 'Yes' take that part to your local hardware store and find the piece to replace it. Components can break down due to a variety of reasons like overuse or trauma while others can actually be corroded by certain chemicals and cleaning products.

If you do not notice any physical damage to the parts then it's time to break out a couple simple tools to help you seal your bathroom drain leak around the threads: plumber's tape and plumber's putty.

PRO TIP: Be diligent. A level head is the most useful tool of them all.

Step 3 – Plumber's Tape & Plumber's Putty

PLUMBER'S TAPE

Plumber's tape is a handy tool that fits directly into the threads of a plumbing joint to create a nice, watertight seal.

To start, get a little bit of slack and carefully apply pressure to the tape and the valve. Now slowly begin to wrap while keeping it nice and tight. Do several revolutions around all threads as necessary. Once you feel good about the wrap job snap off the tape from the roll, clean up any stray tape strings, and you're good to move on to the next step!

How to use PTFE tape – Ultimate Handyman DIY tips courtesy of Ultimate Handyman"

PLUMBER'S PUTTY

Plumber's putty seals the top side of a sink drain by plugging the space where the porcelain and metal drain flange meet.

When using plumber's putty, the first order of business is to make sure all surfaces are clean and dry. Next, take some putty and roll it back and forth in your hands until it looks like a worm. After that, take your putty cylinder and wrap it under the top of the drain piece and set it in the hole in the sink.

How to Use Plumbers Putty | Repair & Replace courtesy of AMRE Supply

Step 4 – Fix and Reassemble

Now that you have everything disassembled, you have an adjustable wrench, and you've got both plumber's tape and plumber's putty it's time to go to work:

HOW TO REPAIR AND REINSTALL A SINK DRAIN (IN STEPS):

  1. Apply plumber's tape to the threads of the drain union.
  2. Wrap a half-inch thick putty ring around the the top of the drain flange.
  3. Insert the drain back into the hole, making sure it's centered.
  4. Tighten the gasket and nut under the sink.
  5. Remove any excess putty from around the drain.
  6. Turn the water to check for leaks.

Remember, there could be more than one thing that's causing the sink drain to leak around the threads. From the actual threads on the nut or pipe to the pop-up sink assembly there are several points where a drain can begin to fall apart.

Simple leaks can be simple fixes, but what about other plumbing projects? Check out our Top 5 Residential Plumbing Services That You REALLY Shouldn't DIY.

Step 5 – When to Call A Plumber

plumbing technician photo

If you've followed the above steps and still can't manage to get the drain to stop leaking then it's time to call a professional plumbing technician. A plumber can easily diagnose the issue and let you know if your issue is just a matter of components or if the bathroom sink and drain need to be replaced entirely.

Fix-A-Leak Recap
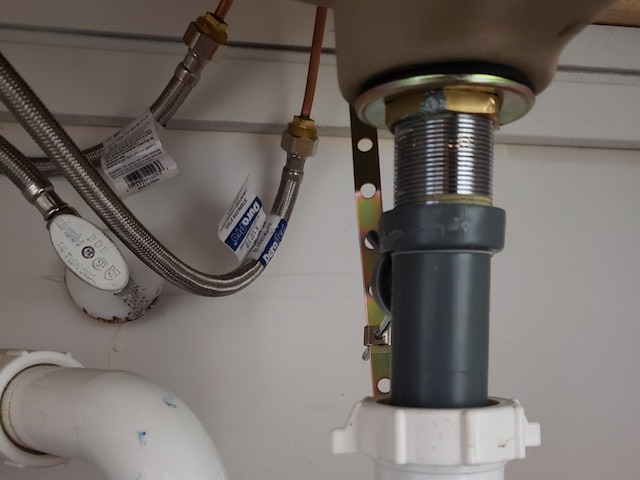
after leak repair

You've done it. You've successfully used a wrench, plumber's tape, and plumbers putty to fix your bathroom sink drain leaking around the threads. How'd it go for? Let us know in the comments section!

If you run into problems or need further assistance contact Premier Plumbing at one of our several Southeast Michigan locations and a plumbing pro will put an end your bathroom sink blues in no-time.

Premier Plumbing Sink Repair Hotline:

Location: White Lake, Michigan
Phone: (248) 363-5864

Location: Hartland, Michigan
Phone: (810) 632-7420

Location: Fowlerville, Michigan
Phone: (517) 223-4360

Email: [email protected]

Request a FREE bathroom sink repair quote with Premier Plumbing, Inc. online at premierplumbing-mi.com/get-a-plumbing-quote/

How To Seal A Bathroom Sink Drain

Source: https://premierplumbing-mi.com/bathroom-sink-drain-leaking-around-threads/

White Bathroom Sink Bowl

White Bathroom Sink Bowl

  • Filter Results

  • Artis White Gloss Floor Standing Drawer Vanity Unit  - 600mm

    Artis White Gloss Floor Standing Drawer Vanity Unit & Basin - 600mm Width

  • essence-white-gloss-bathroom-sink-cabinet-550mm-width

    Essence White Gloss Vanity Unit 550mm

  • essence-white-gloss-d-shaped-toilet-basin-vanity-unit-4-drawer-unit-and-laundry-unit

    Essence White Gloss D-Shaped Toilet & Basin Vanity Unit, 4 Drawer Unit and Laundry Unit

  • artis-white-gloss-floor-standing-drawer-vanity-unit-with-affine-roubaix-countertop-basin-600mm-width

    Artis White Gloss Floor Standing Drawer Vanity Unit & Affine Roubaix Countertop Basin- 600mm Width

  • essence-white-gloss-d-shaped-toilet-basin-vanity-unit-1150mm-width-300mm-depth

    Essence White Gloss D-Shaped Toilet & Basin Vanity Unit- 1150mm Width (300mm Depth)

  • artis-white-gloss-floor-standing-door-vanity-unit-basin-600mm-width

    Artis White Gloss Floor Standing Door Vanity Unit & Basin - 600mm Width

  • Artis White Gloss Floor Standing Drawer Vanity Unit - 800mm

    Artis White Gloss Floor Standing Drawer Vanity Unit & Basin - 800mm Width

  • artis-white-gloss-wall-hung-vanity-unit-basin-600mm-width

    Artis White Gloss Wall Hung Vanity Unit & Basin - 600mm Width

  • essence-white-gloss-bathroom-sink-cabinet-750mm-width

    Essence White Gloss Vanity Unit 750mm

  • essence-white-gloss-d-shaped-toilet-basin-vanity-unit-1050mm-width-300mm-depth

    Essence White Gloss D-Shaped Toilet & Basin Vanity Unit- 1050mm Width (300mm Depth)

  • essence-white-gloss-d-shaped-toilet-basin-vanity-unit-and-4-drawer-unit

    Essence White Gloss D-Shaped Toilet & Basin Vanity Unit and 4 Drawer Unit

  • Aurora White Gloss Floor Standing Door Vanity Unit - 600mm

    Aurora White Gloss Floor Standing Door Vanity Unit & Basin - 600mm Width

  • aurora-white-gloss-cloakroom-vanity-unit-dakota-cloakroom-basin-mixer-waterfall-tap-waste-400mm-width

    Aurora White Gloss Cloakroom Vanity Unit, Dakota Waterfall Basin Mixer Tap & Waste - 400mm Width

  • essence-white-gloss-bathroom-sink-cabinet-850mm-width

    Essence White Gloss Vanity Unit 850mm

  • Essentials White Gloss Bathroom Sink Cabinet - 650mm Width

    Essentials White Gloss Vanity Unit 650mm

  • essence-white-gloss-d-shaped-toilet-basin-vanity-unit-950mm-width

    Essence White Gloss D-Shaped Toilet & Basin Vanity Unit - 950mm Width (300mm Depth)

  • essence-white-gloss-bathroom-sink-cabinet-1200mm-width

    Essence White Gloss Vanity Unit 1200mm

  • essence-white-gloss-cloakroom-vanity-unit-with-basin-450mm-width

    Essence White Gloss Cloakroom Vanity Unit & Basin - 450mm Width

  • aurora-white-gloss-cloakroom-vanity-unit-architeckt-malmo-mini-mono-basin-mixer-tap-waste-400mm-width

    Aurora White Gloss Cloakroom Vanity Unit, Malmo Mini Mono Basin Mixer Tap & Waste - 400mm Width

  • essence-white-gloss-d-shaped-toilet-basin-vanity-unit-4-drawer-unit-and-tall-bathroom-cabinet

    Essence White Gloss D-Shaped Toilet & Basin Vanity Unit, 4 Drawer Unit and Tall Bathroom Cabinet

  • aurora-white-gloss-cloakroom-vanity-unit-basin-400mm-width

    Aurora White Gloss Cloakroom Vanity Unit & Basin - 400mm Width

  • artis-white-gloss-floor-standing-door-vanity-unit-top-board-600mm-width

    Artis White Gloss Floor Standing Door Vanity Unit & Top Board - 600mm Width

  • essence-white-gloss-bathroom-sink-cabinet-1050mm-width

    Essence White Gloss Vanity Unit 1050mm

  • essence-white-gloss-bathroom-sink-cabinet-650mm-width

    Essence White Gloss Vanity Unit 650mm

  • vasari-centro-white-gloss-floor-standing-vanity-unit-basin-500mm-width

    Vasari Centro White Gloss Floor Standing Vanity Unit & Basin - 500mm Width

  • artis-white-gloss-floor-standing-drawer-vanity-unit-with-affine-vannes-countertop-basin-800mm-width

    Artis White Gloss Floor Standing Drawer Vanity Unit & Affine Vannes Countertop Basin- 800mm Width

  • Aurora White Gloss Floor Standing Drawer Vanity Unit  - 800mm

    Aurora White Gloss Floor Standing Drawer Vanity Unit & Basin - 800mm Width

  • Aurora White Gloss Wall Hung Drawer Vanity Unit & Basin - 600mm

    Aurora White Gloss Wall Hung Drawer Vanity Unit & Basin - 600mm Width

  • artis-flat-pack-white-gloss-cloakroom-vanity-unit-basin-400mm-width

    Artis Flat Pack White Gloss Cloakroom Vanity Unit & Basin - 400mm Width

  • Aurora White Gloss Floor Standing Drawer Vanity Unit & Basin - 600mm

    Aurora White Gloss Floor Standing Drawer Vanity Unit & Basin - 600mm Width

  • artis-white-gloss-floor-standing-drawer-vanity-unit-top-board-800mm-width

    Artis White Gloss Floor Standing Drawer Vanity Unit & Top Board - 800mm Width

  • aurora-white-gloss-cloakroom-vanity-unit-essentials-basin-mixer-tap-waste-400mm-width

    Aurora White Gloss Cloakroom Vanity Unit, Essentials Basin Mixer Tap and Waste - 400mm Width

  • aurora-white-gloss-cloakroom-vanity-unit-ibbardo-basin-mixer-tap-and-waste-400mm-width

    Aurora White Gloss Cloakroom Vanity Unit, Ibbardo Basin Mixer Tap and Waste - 400mm Width

  • White Bathroom Sink Bowl

    Source: https://www.plumbworld.co.uk/white-bathroom-vanity-units-19415-0000

    Bathroom Chair Rail

    Bathroom Chair Rail

    Updated for 2022

    Most people don't immediately think of chair rails when trying to think up new bathroom molding ideas, but these small spaces are perfect for adding an interesting touch, above or below a newly added bathroom chair railmolding, that you might be afraid to try in a larger room. Whether it's graphic wallpaper or a fun paint technique, exploring different chair rail ideas in a bathroom is a great way to decorate this small space in your home.

    The bathroom is also a great space to use special materials. While chair rails in other parts of the house, like the bedroom or dining room, are usually wood moldings, the bathroom is the one place you can use tile! Besides being the practical choice in a room with sinks and showers, there are endless options for beautiful bathroom tile – including tile that looks just like chair rail molding.

    Hopefully the following bathroom chair rail ideas will inspire you to perk up your powder room and rejuvenate your master bath!

    Nautical Traditions


    This bathroom look combines two distinct historic décor designs: angular Art Deco bathroom fittings with softer nautical themed toile de Jouy wallpaper. Linear chair rail moldings with navy blue accent underneath ties this look together beautifully.

    Arabesque and Marble


    With a nod to Art Deco, this stylish bathroom uses arabesque motif wallpaper, a marble countertop and brushed chrome fittings to exude a quiet glamor. The chair rail and picture frame molding adds an extra level of sophistication to the whole look.

    Clean Contemporary Lines


    This transitional bathroom design uses chair rail moldings and impressively molded baseboards to complement the strong lines created by the mirror, sink, floor tiles and window-frame. The freer style of the wallpaper design softens this linear composition, and the gray grape color of the lower wall panel brings the color scheme together.

    Picture Frame MoldingPicture Frame Molding
    This powder room features a classic white bathroom chair rail and picture frame molding underneath, adding architectural elegance to the small space.

    Gray Grasscloth Gray Grasscloth
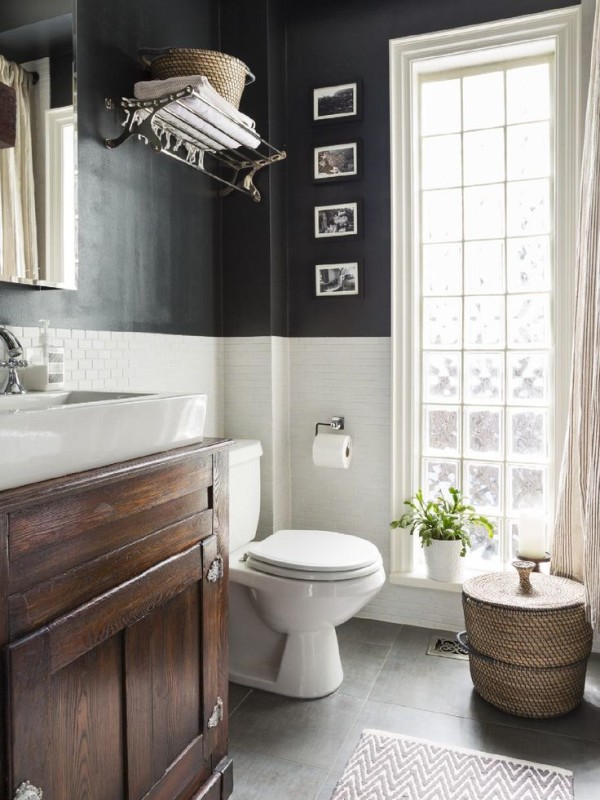
    Despite the neutral colors, this room is full of texture, including the bathroom chair railmolding, beadboard panels, and gray grasscloth. Never be afraid to combine patters, wood types and classic tiles when your bathroom molding ideas call for a bold statement!

    Hint of StripesHint of Stripes
    The chair rail in this bathroom provides a division on the wall and an opportunity to use whimsical décor both above and below the molding. As you see, the owner used a solid 1×4″ wide piece of wood to create the separation. Don't limit your chair rail ideas in a bathroom to the off-the-shelf moldings you can get in local stores.

    Display SpaceDisplay Space
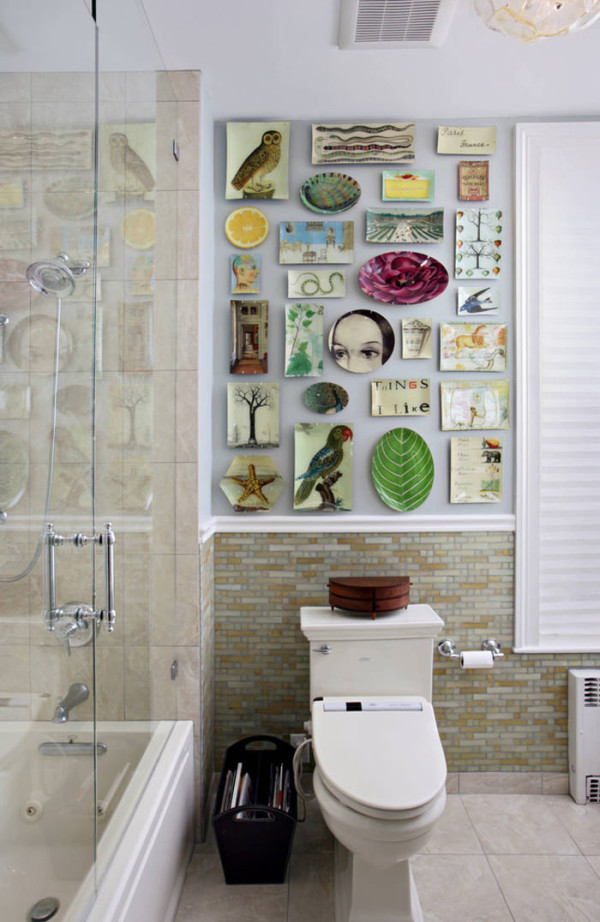
    Create a unique display space by placing artwork, plates, or photographs above a chair rail.

    Pop of PatternPop of Pattern
    The graphic branch design of the wallpaper adds a modern flair to the timeless tile chair rail.

    Mosaic BorderMosaic Border
    By doubling up on the bathroom chair rail molding, putting a standard size on bottom and a smaller piece on the top, space is created for a colorful mosaic accent in this newly-renovated master bathroom.

    Light and DarkLight and Dark
    The light gray paint above the chair rail prevents this bathroom from getting overwhelmed but the black tile on the wall and floor.

    Shimmery ShineShimmery Shine
    A tile chair rail and classic white subway tile provide a contrast to the watery shimmer of the tile on the top half of the wall.

    Classic StylingClassic Style
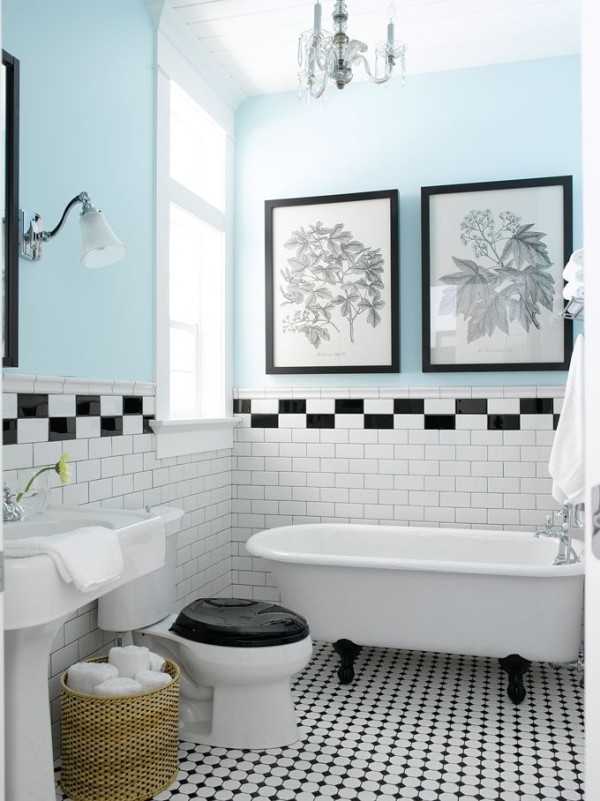
    Classic black and white takes center stage in this small bath! A fresh blue paint is paired with white subway tile and black grout under the chair rail.

    Modern Levels
    This contemporary bathroom features multiple levels of moldings. The high molding behind the sink allows the tile to be carried all the way up the wall.

    Bathroom Chair Rail

    Source: https://www.renocompare.com/chair-rail-molding-ideas-for-the-bathroom/

    Fashion

    Sport

    Hotels

    banner